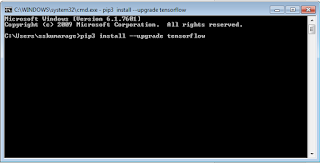
Install tensorflow on ubuntu There are different mechanisms. virtusalenv "native" pip docker anaconda virtualenv is the recommended mechanism virtualenv is a virtual python environment isolated from other python development incapable of interfering with or being affected by other python programs on the same machine during the virtualenv installation process, you will install not only tensorflow but also the packages that the tensorflow requires. To start working with tensorflow you simply need to activate the virtual enviornment. all in all, virtualenv provides a safe and reliable mechanism for installing and running tensorflow. Steps install pip,dev and virtualenv for python 2.7 sudo apt-get install python-pip python-dev python-virtualenv create a virtualenv environment inside home for python 2.7 virtualenv --system-site-packages tensorflow activate t
Posts

Getting familiar with Machine Learning | Neural networks vocabulary Neural networks always performs well with training. To perform training on the neural network we need data. Following is the example data set of iris flowers. It has 5 columns. Sepel length, Sepel width , Petal Length , Petal Width decides the species of the iris flowers. We are going to predict the species of a particular flower depending on these characteristics. According to that knowledge we have 4 characteristics of data which we know. We call them features. So Sepel length, Sepel width , Petal Length , Petal Width are the features of this data set. Species field is the label which we are going to predict. Rows of this data set are called examples . Which means , example is a set of features and labels for a particular record. We can optimize the neural network model by training. When we train the model by using the examples with labels we call it supervised machine learn
Training of a Keras model Numpy arrays of input data and labels are used to train the Keras models. For training Fit function is used. For a single-input model with 2 classes (binary classification): model = Sequential() model.add(Dense(32, activation='relu', input_dim=100)) model.add(Dense(1, activation='sigmoid')) model.compile(optimizer='rmsprop', loss='binary_crossentropy', metrics=['accuracy']) # Generate dummy data import numpy as np data = np.random.random((1000, 100)) labels = np.random.randint(2, size=(1000, 1)) # Train the model, iterating on the data in batches of 32 samples model.fit(data, labels, epochs=10, batch_size=32) For a single-input model with 10 classes (categorical classification): model = Sequential() model.add(Dense(32, activation='relu', input_dim=100)) model.add(Dense(10, activation='softmax')) model.compile(optimizer='rmsprop',
Compilation of the module Compilation configure the learning process of the module. It is done via compile method. It takes 3 arguments. Optimizer Can use string identifier of an existing optimizer (rmsprop | adagrad) or instance of an existing Optimizer. Loss Function Model always tries to minimize the loss. Can use existing string identifier of an loss function ( mse | categorical_crossentropy)or an objective function. A list of metrics For any classification problem set metrics to accuracy. metrics=['accuracy'] metric could be a string identifier , existing metric or custom metric function. # For a binary classification problem model.compile(optimizer='rmsprop', loss='binary_crossentropy', metrics=['accuracy']) # For a mean squared error regression problem model.compile(optimizer='rmsprop', loss='mse') # For custom metrics impo
Keras Sequential Model Creating the model | Specifying input size and batch size | specifying the activation function Sequential Model : Linear stack of layers. Create a Sequential Model by passing the layer instances to the constructor. Import sequential model from Keras models. from keras.models import Sequential Import dense layer and activation function from keras layers from keras.layers import Dense, Activation Create sequential model Input = can be of any dimension or a single element Shape = length along each dimension of the input Model needs to know the input shape it expects. Only the first layer of the sequential model should know its input shape. Batch = collection of inputs Batch Size = no of inputs Create the model model = Sequential() Create the layer with batch size of 32 and input size of 784 Dense(32,input_dim=784) Add the layer to the model model.add(Dense(32,input_dim=